Set up your review workflow
In about 15 minutes you clone the Default Workflow, check the Client review toggle and the Start review transition, and send the first task to your client for review.
What you will have at the end
- A workflow of your own, cloned from the Default Workflow
- A status with the Client review toggle
- The Start review transition into that status
- A first task your client can approve or send back for revision
Before you start
- Starter Starter , Pro or Enterprise — own workflows need a paid plan
- A premium project to assign the workflow to
- At least one person on the client side with portal access, see Invite your first client
Steps
-
Open Workflows
Open the avatar menu at the bottom of the sidebar and click Workflows. Without a paid plan a payment window opens instead. Overview: Workflows.
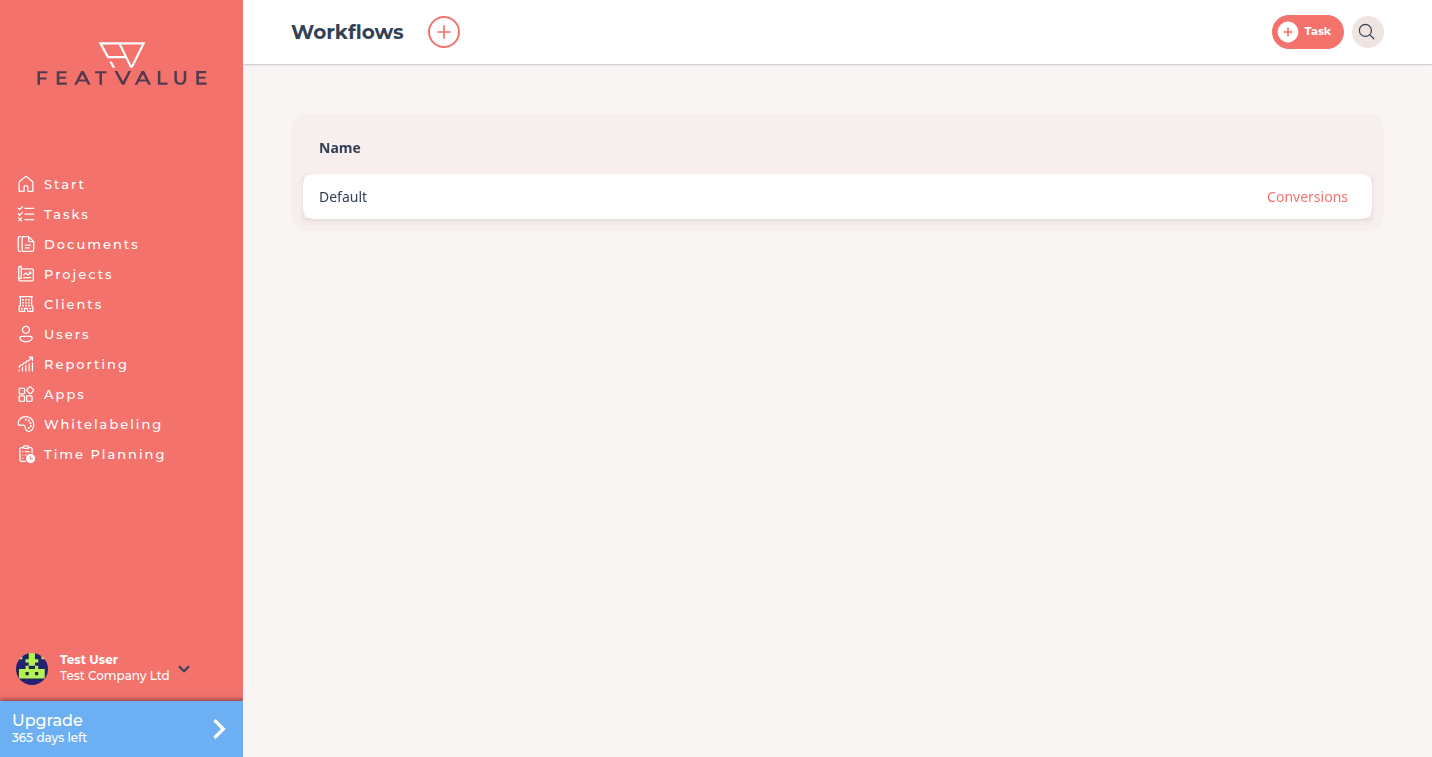
Workflows opens from the avatar menu. -
Clone the Default Workflow
The public Default Workflow is read-only. Click New Workflow, pick Default Workflow as Template and click Create. FeatValue copies the template into your company.
-
Check Client review
Select the review status, In review on the Default Workflow, and expand Semantic Classification. Client review is already on there. Keep it on unless the review should happen in another status. Details: Client review status.
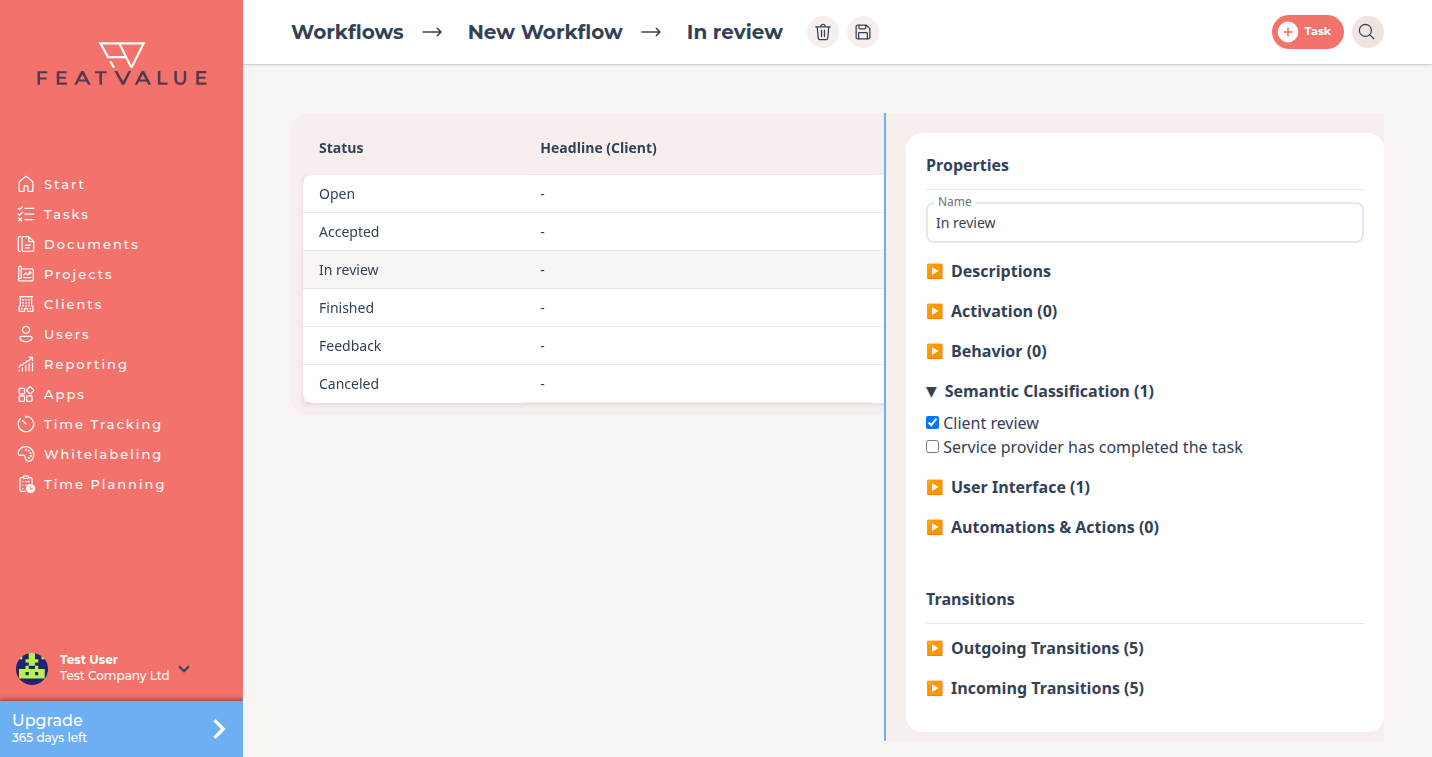
On the status In review, the Client review toggle is on under Semantic Classification. -
Check the Start review transition
Select the status In Progress and expand Outgoing Transitions. The move to In review is named Start review. Keep that name so the button on the task stays clear. Click Save. Options: Transitions.
-
Assign the workflow to the project
Open the premium project under Projects and, under Other settings, set Workflow to your new workflow. FeatValue converts existing tasks to the new statuses.
-
Start the first review
Open a task in the status In Progress and click Start review. In the dialog, add a note under Your annotation that helps your client review the task. Click Send or Send without annotation. Your client then sees the task with I am satisfied or Request revision. How the review works: Review and acceptance.
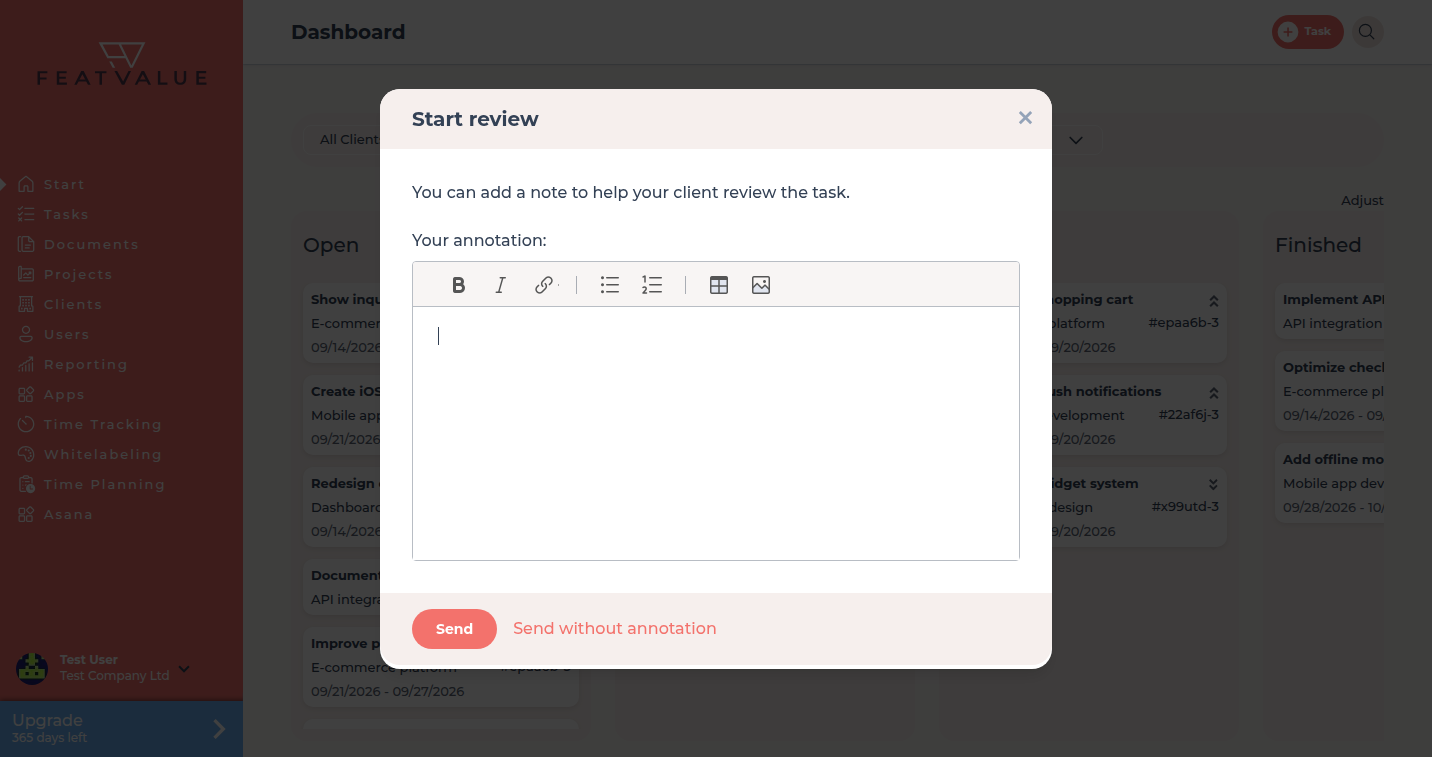
The Start review dialog, here after dragging a card on the dashboard.
Check your result
Complete setup closes Configure client review process once a status has the Client review toggle. The task is now In review, and your client gets the review email. Comments on the task stay locked until the client decides.
Next steps
- Brand your client portal
- Review and approve tasks for the client side
- Transition emails for extra emails on a status move
Your question has not been answered?
We will be happy to help you. You can send us an e-mail or arrange a video conference: