Show clients the timeline
In about 10 minutes you open the waterfall timeline or manual sprint planning and give clients access so they see the schedule — before automatic sprints run.
What you will have at the end
- A premium project in Waterfall or Sprints (static) mode
- The timeline or sprint board under Time Planning
- Clients who see the same plan in the portal
Before you start
- A premium project
- Tasks with a start and end (waterfall) or a sprint assignment (manual sprints)
- This guide does not replace Plan sprints automatically. It comes first.
Steps
-
Set the planning mode on the project
Open the project and, under Other settings, set the time-planning mode. Choose Waterfall for a timeline or Sprints (static) for a board you fill yourself. The setup wizard calls the static mode Manually or via project management. Overview: Time planning.
-
Open Time Planning
Click Time Planning in the left sidebar. Waterfall projects open the Timeline, static sprints open the Sprint Board. If you use both, pick the entry in the submenu.
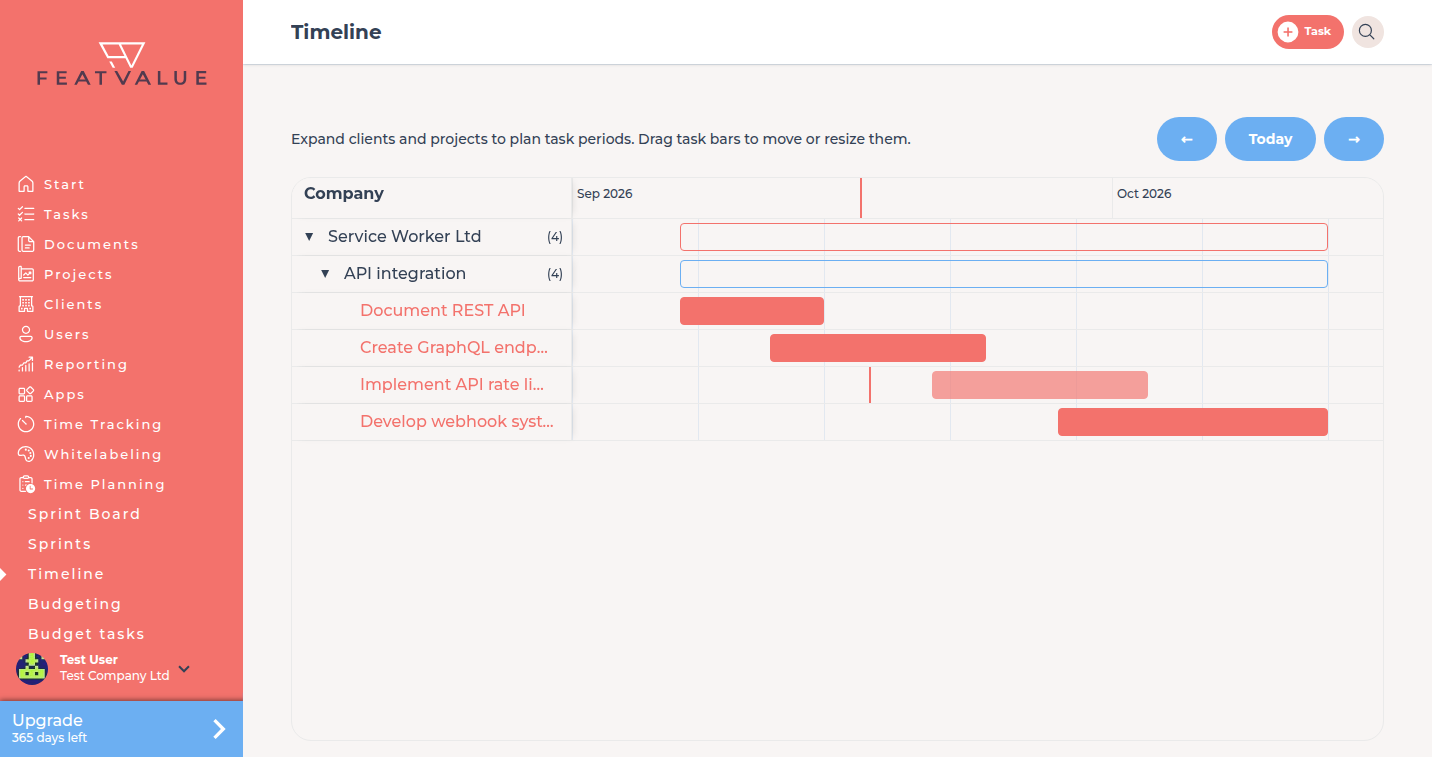
The timeline shows each task as a bar between start and end. -
Fill the plan
In waterfall mode each task has a start and end. The bars take the dates from your project-management tool, or you drag them into place on the timeline. In static sprint mode you drag tasks into sprints or keep the assignment from the connected tool. Details: Waterfall and timeline and Sprints.
-
Check client access
Open Settings → Time Planning. For new companies the checkbox Clients have access to time planning is ticked by default. Tick it if it is missing so your clients see the same plan.
Check your result
Time Planning shows the timeline or sprint board with imported or manually set dates. Someone on the client side sees the same plan once access is on. You do not need automatic sprints for this.
Next steps
- Import time entries for used hours on the board
- Plan sprints automatically if FeatValue should place the work later
Your question has not been answered?
We will be happy to help you. You can send us an e-mail or arrange a video conference: